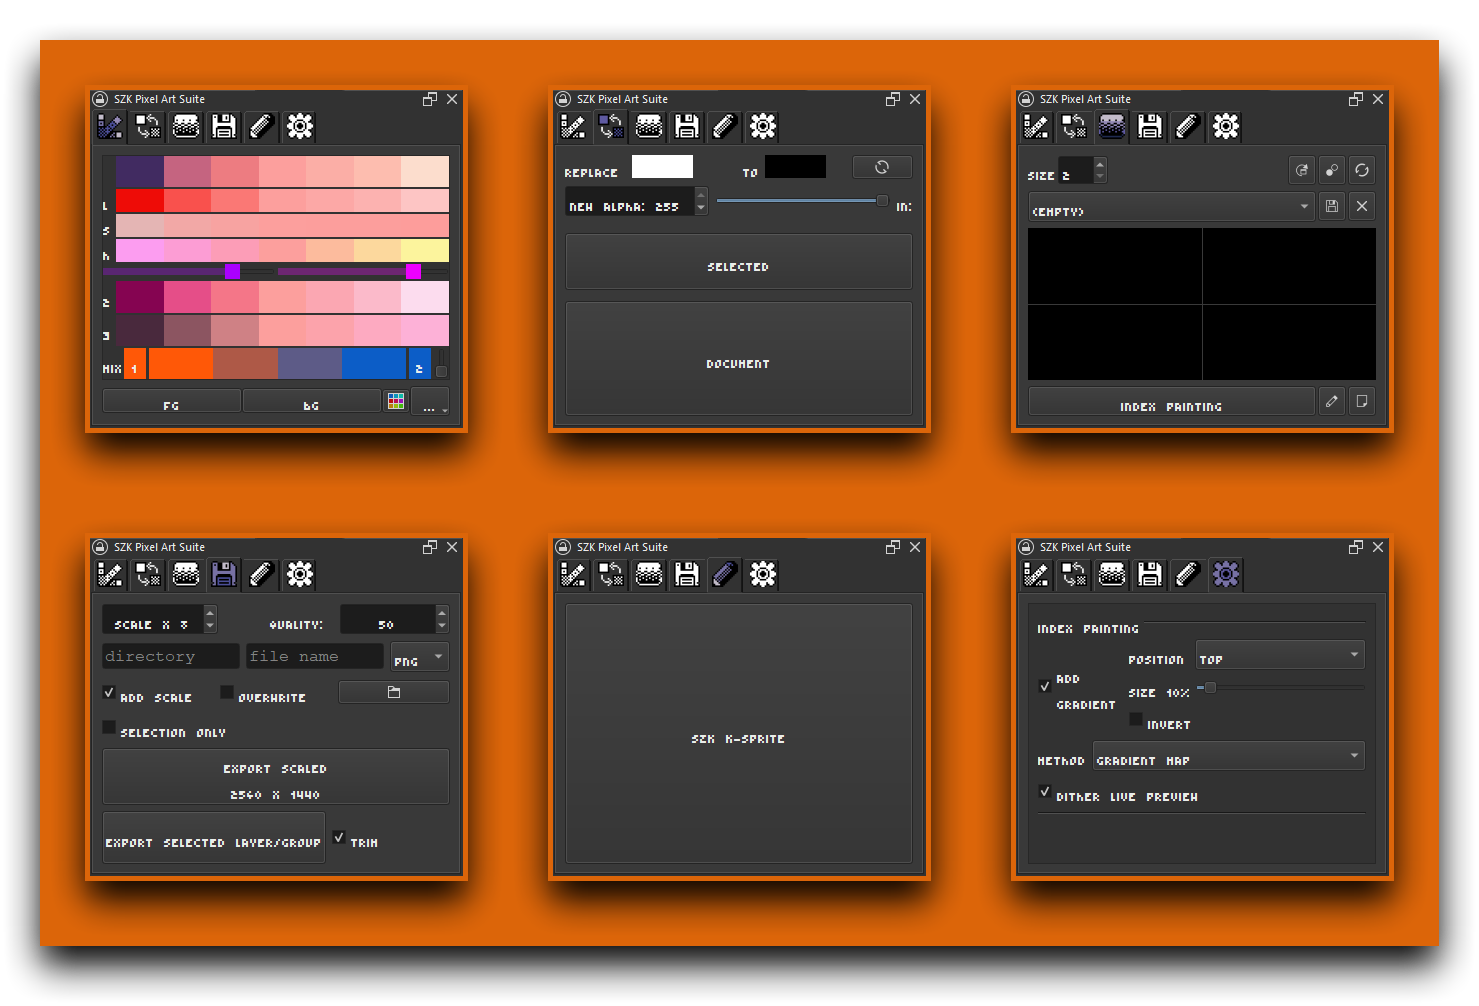
This is inspired by the color shading panel from Pyxel Edit, which provided interesting color shadings very easily.
It brings its original functionality to Krita and expands on it by adding a few more options.
It works by generating color variations based on a color. This base color is always at the center of a palette (except for the “mix” (mixer) palette).
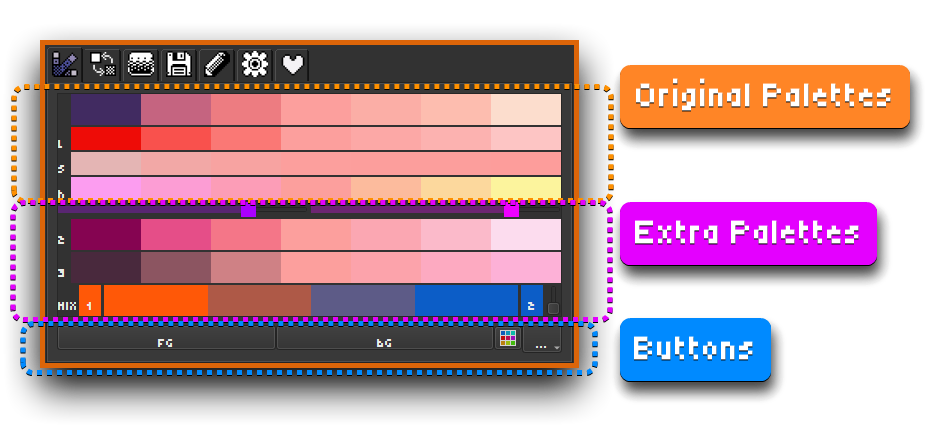
Original Palettes Explained
This section is inspired by the original shading system from Pyxel Edit.
The main shading palette (on top), works by shifting the value, saturation and hue to an specific blue tone for the dark tones (on the left). For the brighter colors (on the right), works the same but shifting the colors to a brighter yellow hue.
l - Shifts (only) the value/light.
s - Shifts (only) the saturation.
h - Shifts (only) the hue.
l, s and h are very useful for fine-tuning your colors using the Middle MB(See ‘Swatches’ section)
Extra Palettes Explained
The shading palettes 2 and 3 are affected by the hues selected in the sliders above. The left slider controls the hue for the shadows, while the right slider controls the hue for the bright colors.
This offers more control for making cohesive color combinations under specific settings.
For example, lets say you are painting a sunset scene with an orange light source, and you want the shadows to gather around a pink. You can select both hues in the sliders and generate easily colors that look good in that setting.
2 uses the same algorithm as the one inspired by Pyxel Edit.
3 Uses a different algorithm (it usually gives more muddy colors for the shadows and more coloured lights).
Mixer (Mix)
Mixes 2 colors.
It uses an algorithm that checks hor similar are both colors, and reduces/adds more swatches depending how similar they are.
(The more different they are, the more steps/swatches it adds).
You can still change the resolution/number of steps by changing the slider next to the 2
Press the 1 and 2 buttons to change the colors that are mixed.
Those buttons have the following shortcuts:
Shortcut
Action
Left MB
Triggers the color selector
CTRL + Left MB
Triggers the color picker to grab any color
ALT + Left MB
Picks the Foreground color
Right MB
Picks the background color
I personally find the CTRL + Left MB very useful and fast, and is the main way I use the mixer.
To generate a shading palette:
Press the FG / BG button to grab your current foreground/background color and build the shading palettes around it.
A ‘swatch’ is a single color sample of a gradient.
Mouse Button (MB) shortcuts/actions:
Shortcut
Action
Left MB
Pick foreground color
Right MB
Pick background color
Middle MB
Pick foreground color and rebuild the palette
I personally find Middle MB very useful for fine tuning your base color by shifting its value, hue, saturation, etc. until you got a shading that you like 👌.
When you click a swatch, the color becomes active:
The white border indicates the color is selected
Once a color is selected, you can:
Move easily forwards/backwards in the active shading palette with a shortcuts. (See shortcuts section)
Add the whole shading to your active palette.
Managing Palettes
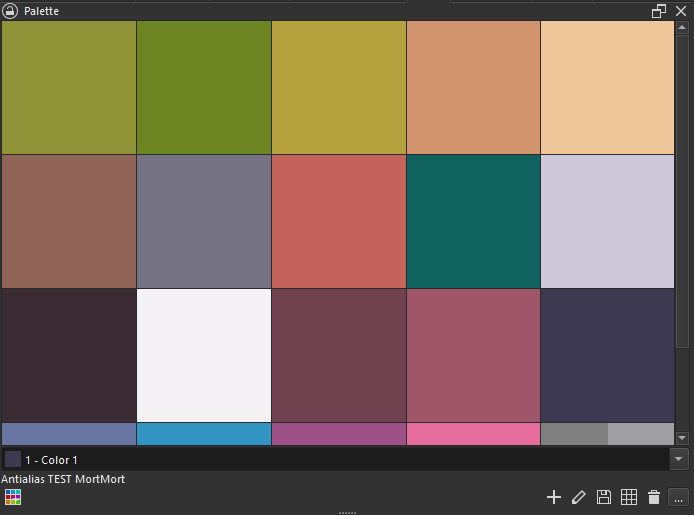
The Color Shading tab is “connected” to the native Palette docker by Krita.
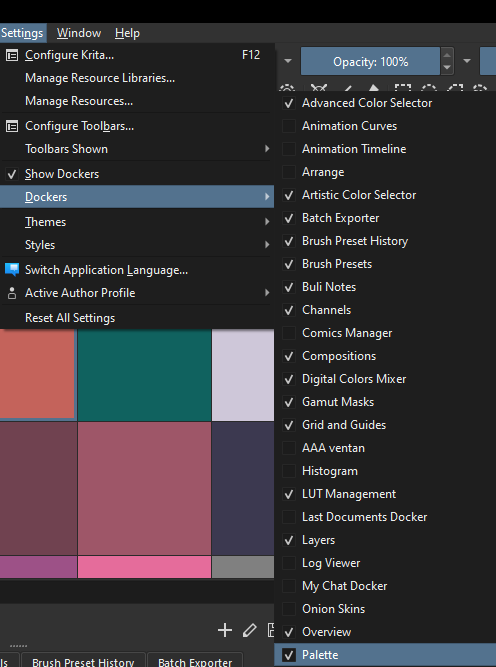
How to show the Palette docker
Go to Settings -> Dockers -> Palette
A docker like this will appear:
Native Palette docker
Add colors to palette
When you have a gradient selected (by having selected a swatch), you can add all its colors to the active palette. For that, press this button:
Adds the selected gradient to the active palette
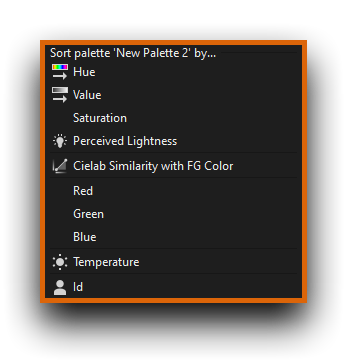
Sort Palettes
It includes actions for adding and sorting colors in Krita’s default Palette docker by different criteria (hue, value, saturation, perceived lightness, color similarity, etc.), similar to other softwares.
This is something I personally find very useful when working with limited color palettes.
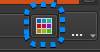
To sort your active Palette, press the … button:
Most are self explanatory. Even though, some ones worthy to explain:
Perceived lightness: This sorts the colors according how human eye perceives lightness. Is not always the same as the “value” sort.
Cielab similarity: Sorts the colors of your palette according by how similar they are to your active (foreground) color.
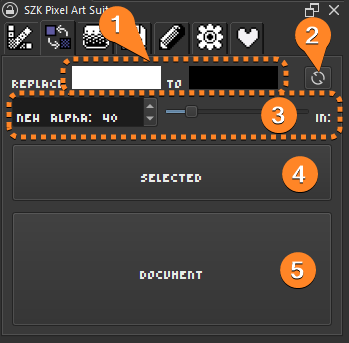
Color Replace
Allows to precisely replace an specific color in the selected layers/groups or in the entire document.
This is useful when you want to change a palette or a certain color of an entire document or layer.
The color to be replaced has to match the exact color (there is no treshold margin).
1 - Color to be replaced (left) and new color (right)
Same shortcuts like in the Mixer apply here
Shortcut
Action
Left MB
Triggers the color selector
CTRL + Left MB
Triggers the color picker to grab any color
ALT + Left MB
Picks the Foreground color
Left MB
Picks the background color
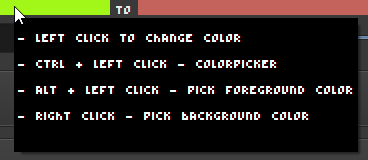
Youdon'tneedtorememberthem!Just **hover** the mouse under the colors **to see a tooltip** with these **shortcuts**:Tooltip when hovering the color buttons
2 - Swap replaced and new color.
Note: At the moment undo/redo is not supported natively in Krita’ scripts, so if you want to undo changes you can swap the colors (with the swap button) and re-execute the color replace.
3 - Alpha for the new color (in case you need to set a new one).
4 - Replaces the color in the selected layer(s).
You can select more than one layer.
5 - Replaces the color in every layer of the active document.
Index Painting
Sets up an index painting group for a layer (or group) with a single click.
What is Index Painting?
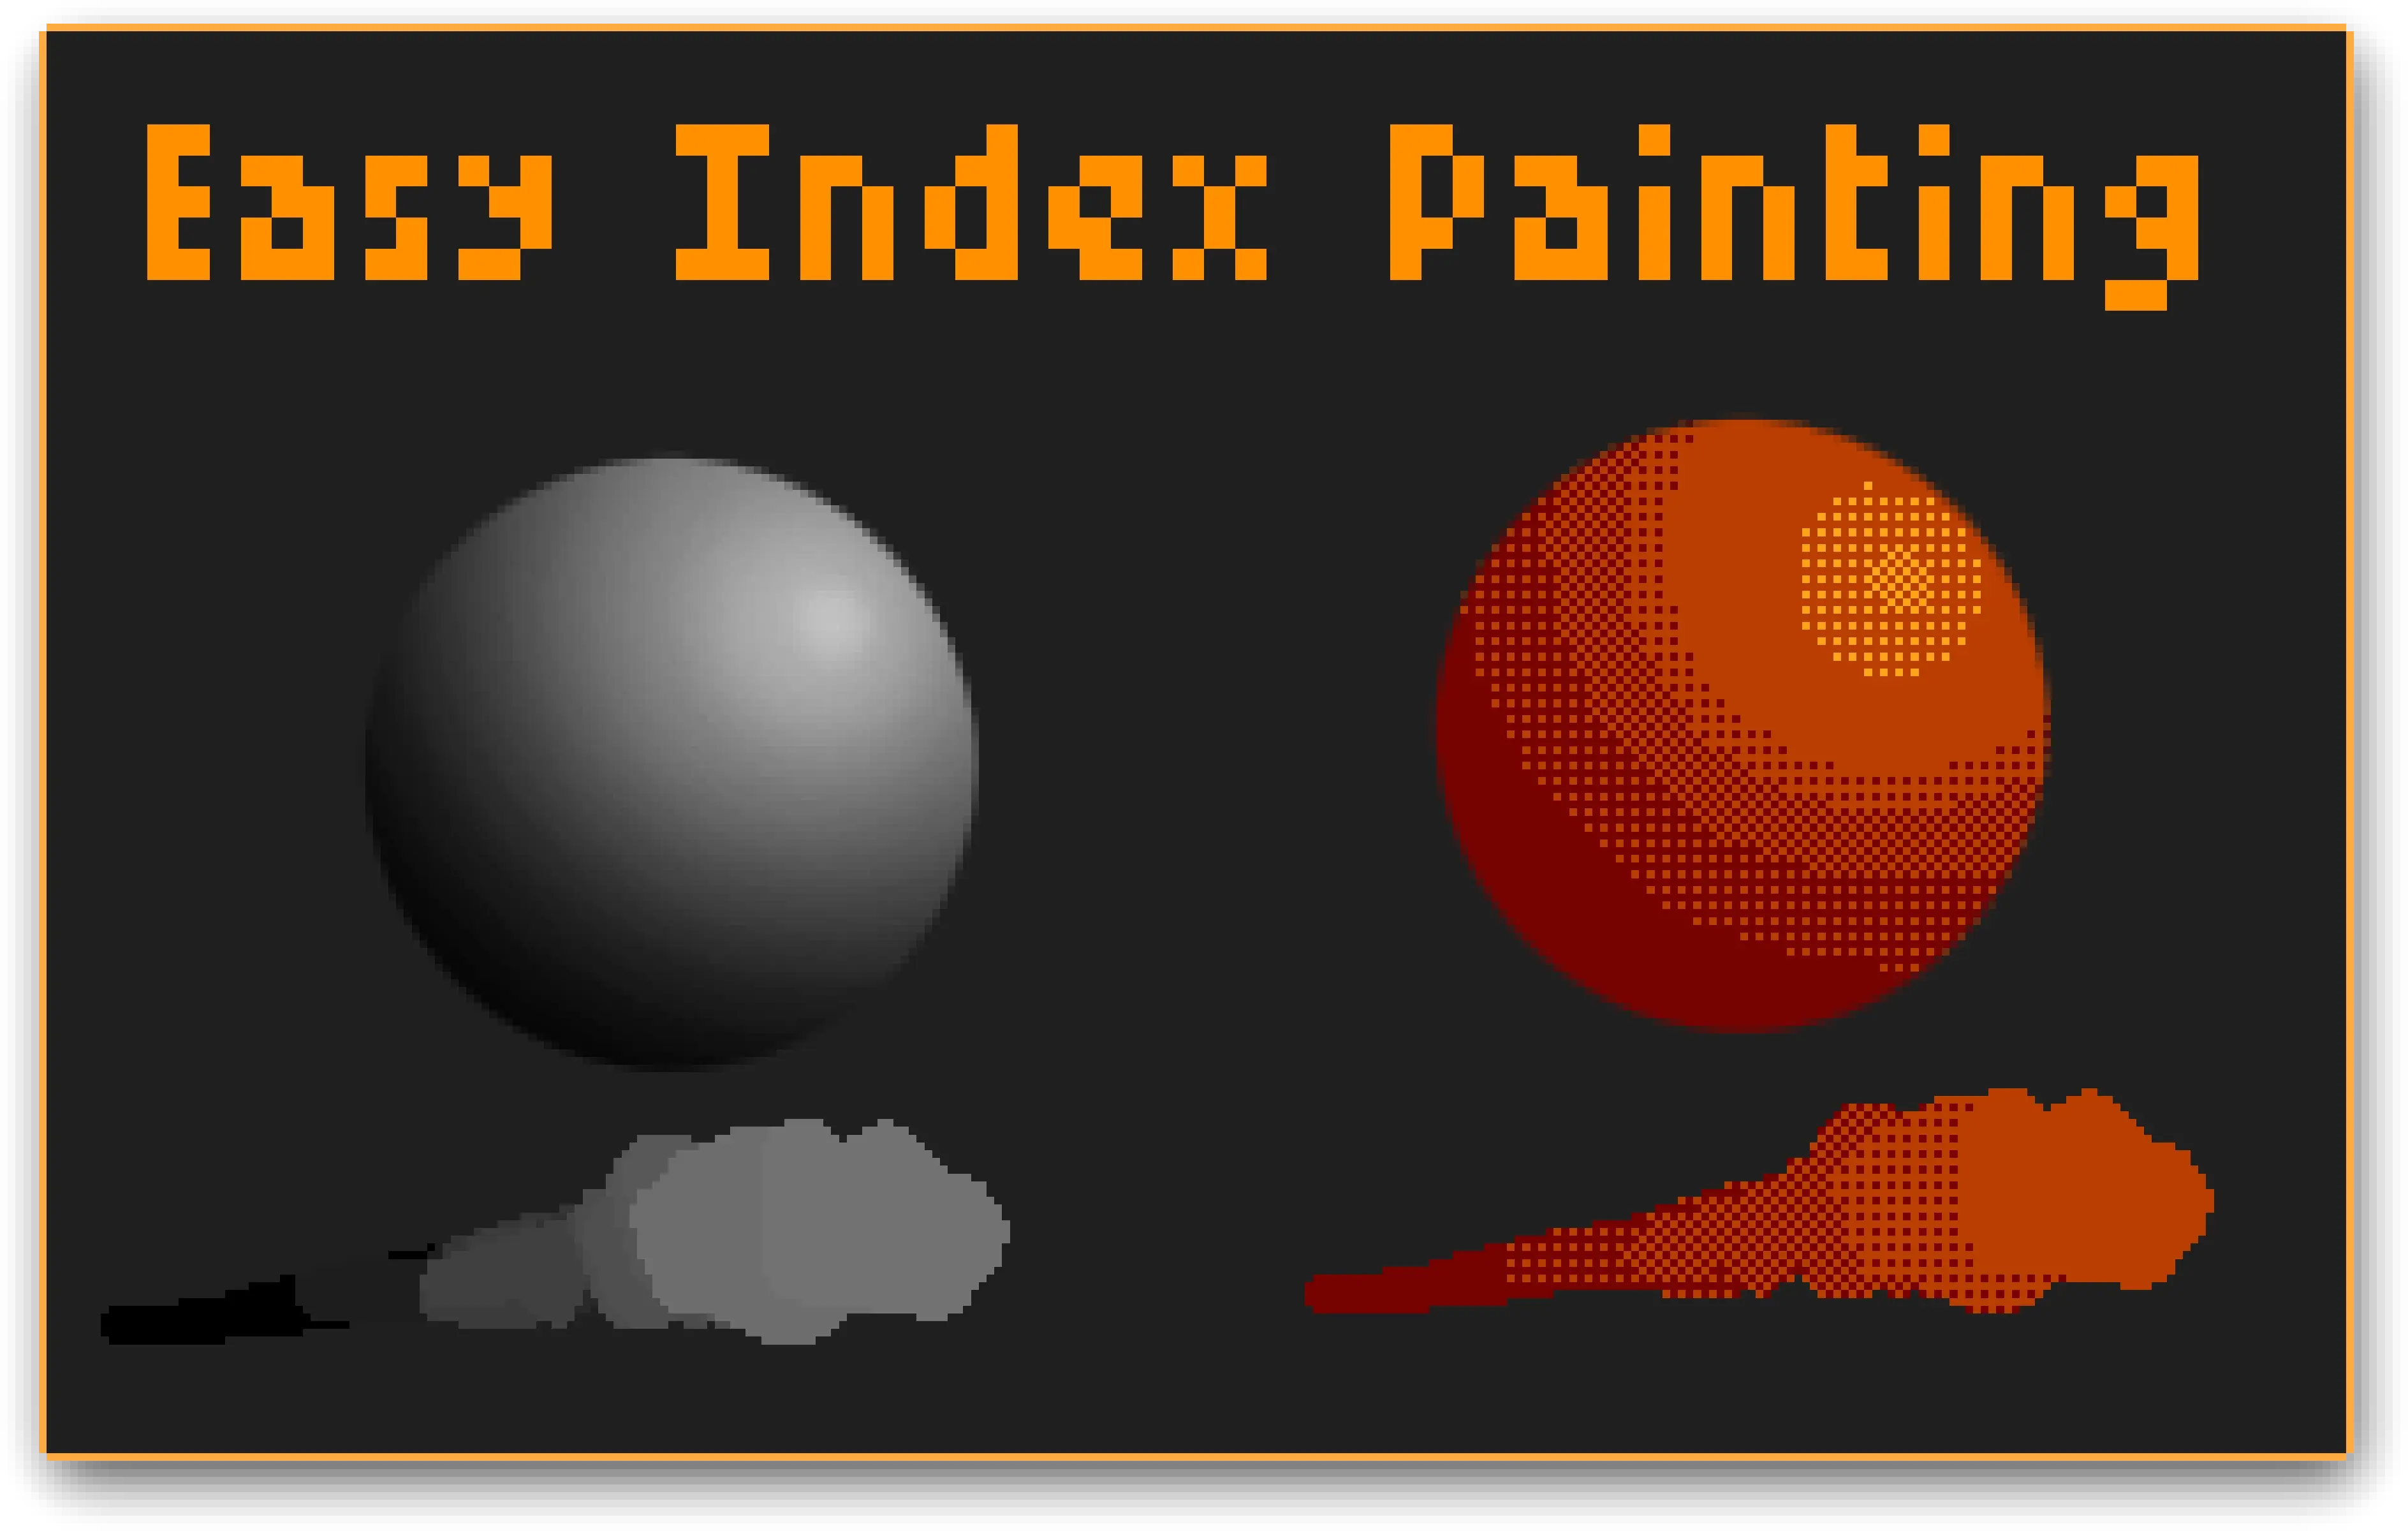
Index Painting is a technique that automatically dithers and reduce colors on a non-pixel art artwork.
This means that youcanuseallyournon-pixelartbrushesinKrita, gradients, etc. for painting and still obtaining a Pixel Art aesthetic. 👌
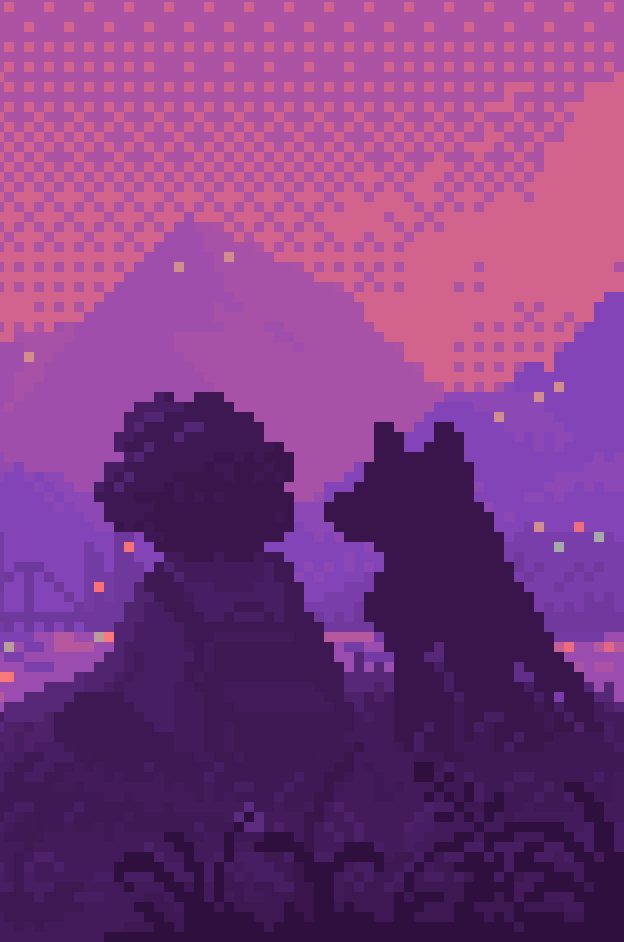
Cool example of the aesthetic that is achievable with index painting:
It comes with a pattern editor that allows to create, save and load different patterns-pressets for the dithering effect:
This is mostly to play, experiment and discover new and cool pixel gradient effects.
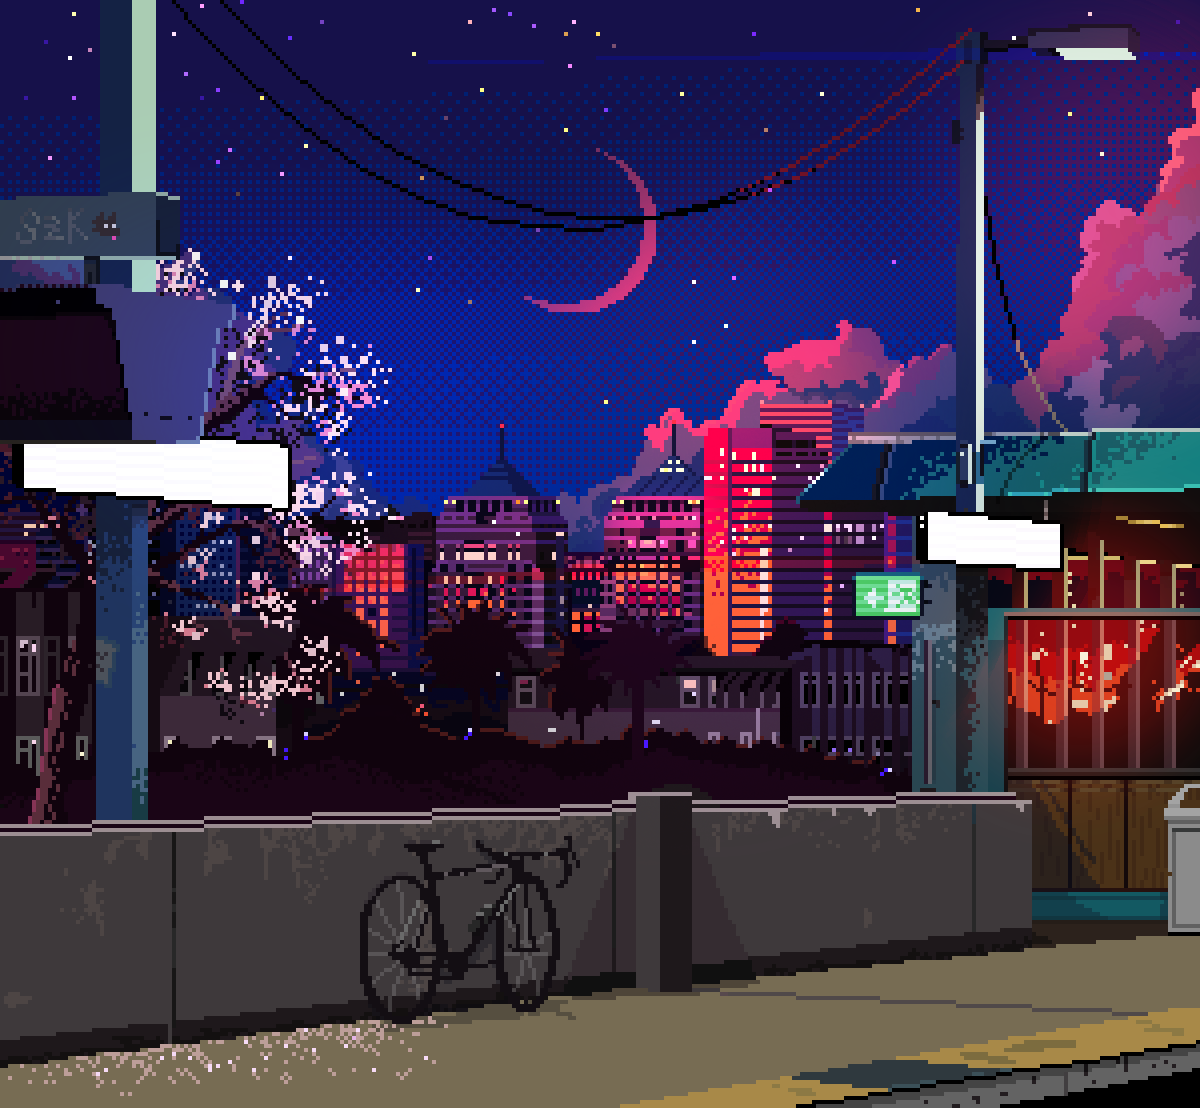
I made the sky in this piece using Index Painting
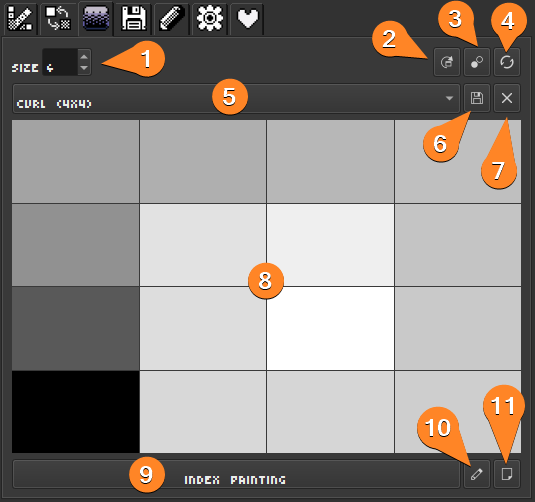
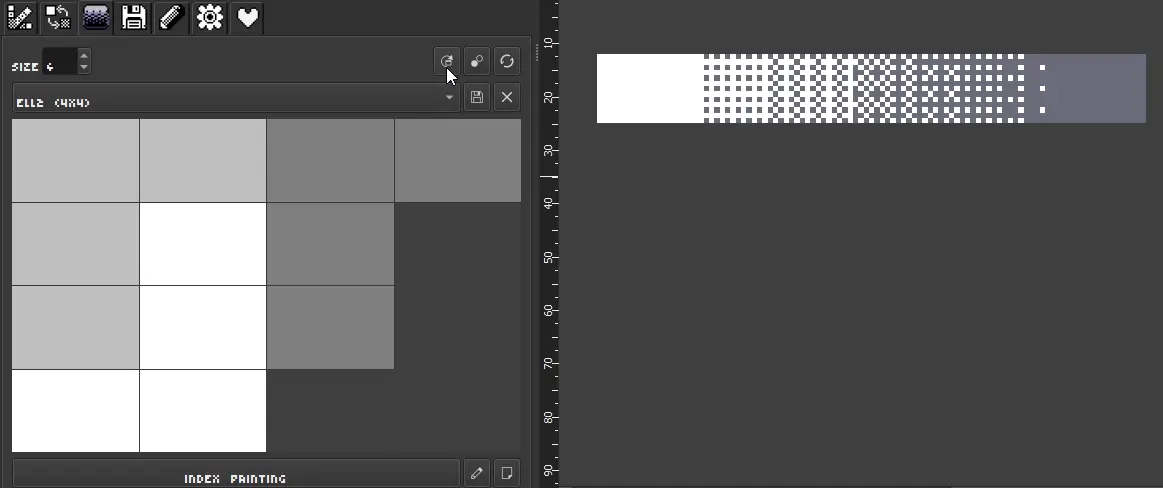
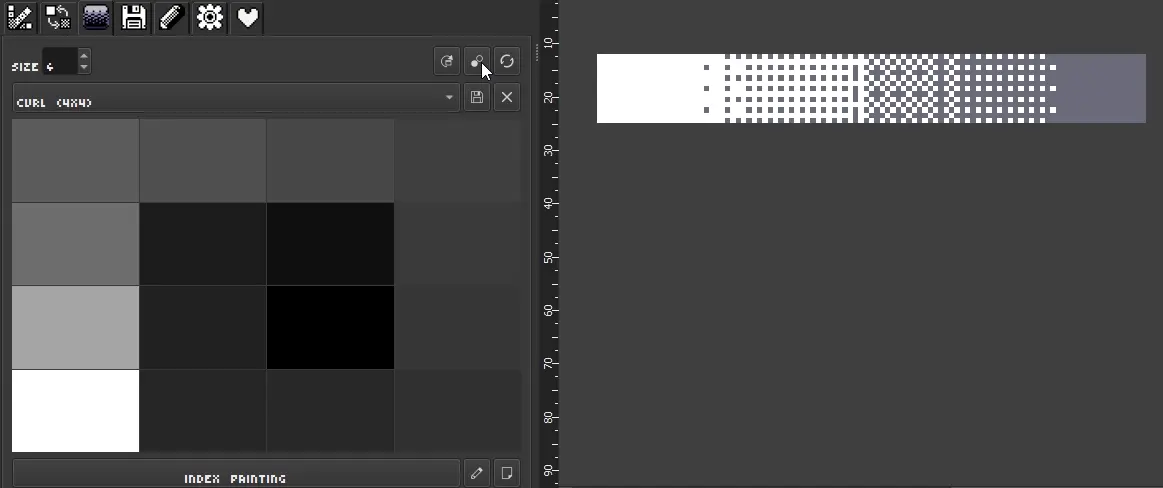
Interface
1Matrix Size: Increase/decrease the rows/columns of the dither matrix.
2Rotate: Rotates the dither matrix.
3Invert: Inverts the color in the dither matrix.
4Clear the matrix: Resets all cells.
Press it twice to fill/clear all the cells.
5Dither Presets: Change the dither preset.
6Save Preset: Save your own dither preset for using it later.
7Delete Preset: Deletes the selected preset.
8Dither Matrix: Here you can paint/modify each cell of the dither matrix. Each cell represents a pixel of the dither pattern.
There is some different ways for painting the matrix:
Shortcut
Action
Left MB / Right MB
Activate/deactivate cell (full painting)
CTRL + Left/Right MB
Adds/Substracts a cell value in quantized steps.
ALT + Left/Right MB
Smooth painting.
TIP: Hover a cell (or any UI element) to see its tooltip with its information.
ℹ️ NOTE: You can use this matrix for easily painting patterns with K-Sprite!. (See Tool Options for more info)
9Create Index Painting: Press to generate an Index Painting folder for the selected layer/group.
10Repaint the dithering layer: Updates the dither pattern. Useful to call it after drawing on the matrix.
The active layer must either be the “Dither” layer, or a sibling of the “Dither” layer.
Note: The dither layer must be named “Dither”. This is due that after pressing the button, it searches if there is an Index Painting group set up with a dither layer.
11Create dither pattern layer: Adds a dithering layer with the dithering pattern set on the matrix
This can be used as a pattern generator (useful for making textures for brushes, gradients, etc).
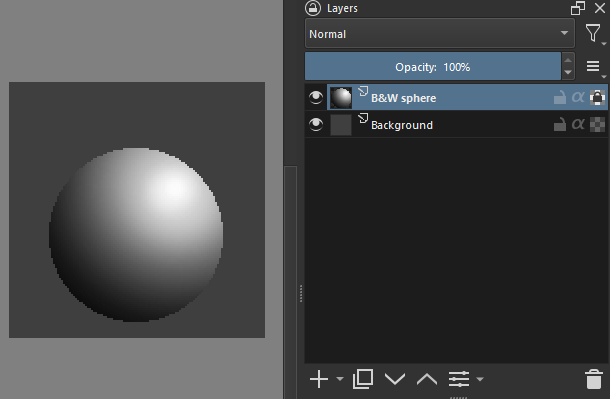
Setting an Index Painting group
Having a black and white drawing (or an empty layer if you want to draw from scratch):
Note: It is preferable if the drawing already has crisp/hard edges, since Index Painting tends to generate smooth soft edges in the silhouettes (which is not desirable for Pixel Art).
Press the button Index Painting, in the Index Painting Tab:
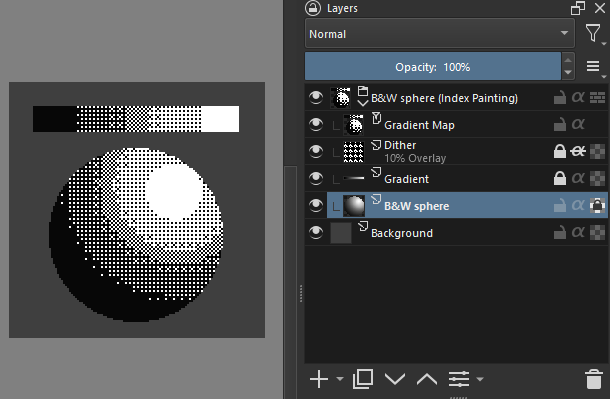
It will result in something like:
It makes a group with everything needed for Index Painting.
Note: Right Click on this layer to open the Properties and edit the colors used for the shading.
Dither: This layer holds the dither pattern from the dither matrix.
Note: If you are using a Gradient Map, you can change its pattern in its settings (Right Click on the layer -> Properties). Having both patterns combines them and increases the dithering effect.
TIP: Increase/reduce its opacity to change the dithering effect.
Gradient (optional, depends on your Index Painting Options): It helps to visualize the effect and to sample colors.
Having the “Gradient” layer selected, you can sample its black and white colors with CTRL+ALT+LeftMButton, and have an idea of the dither amount that value will have.
[Your selected layer/group] (B&W sphere in this example): Thisiswhereyouhavefunandpaint(inblackandwhite)!
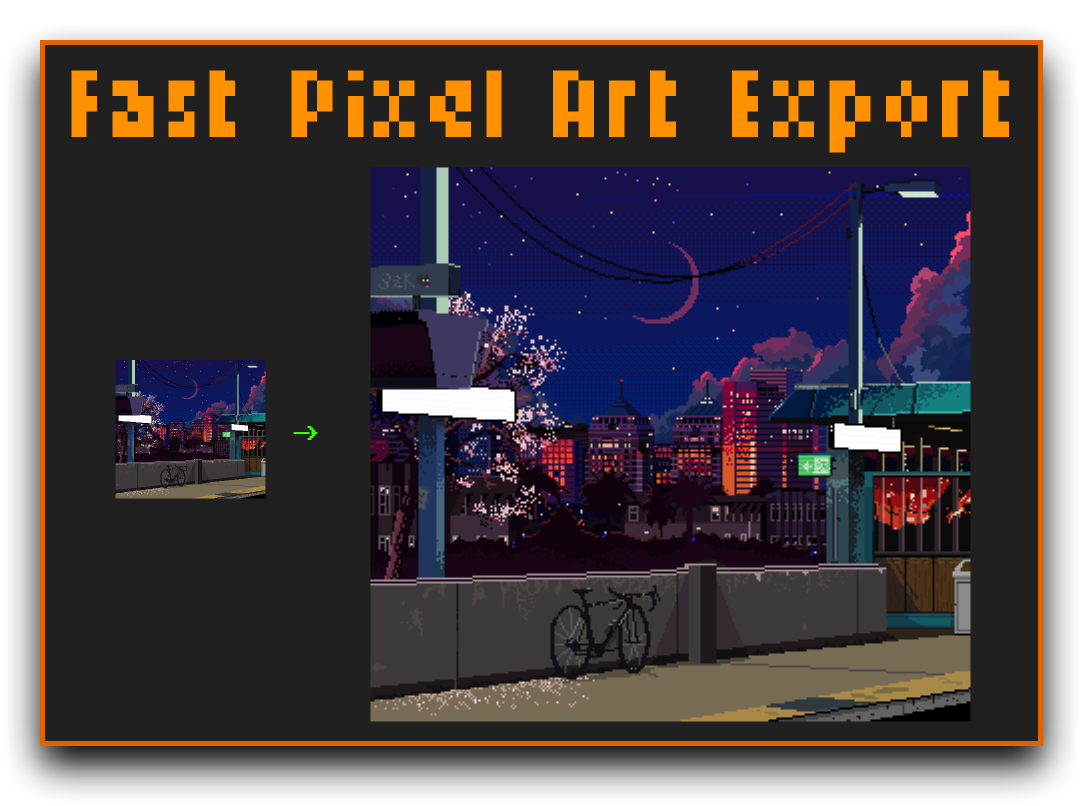
Export Tab
Allows exporting the document (or any selected layer(s)) scaled by a factor very easily and fast.
Left: Original scale. Right: Scaled
Useful when you want a higher resolution image of your Pixel Art drawing.
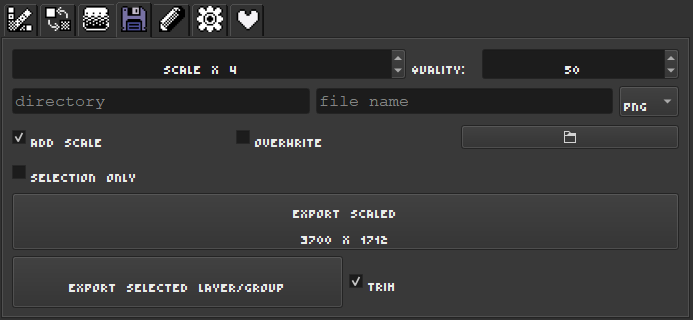
Export tab
Image settings
Scale: Size multiplicator.
Quality: Image compression quality. The higher, the better quality (and the file size).
Since Pixel Art normally tends to have lots of contiguous pixels with the same value, a low value usually keeps enough quality.
Directory: Suports both relative and absolute directories.
relative example: Setting a value of, lets say, Exports/Version 1 will make the exported images to be in a subdirectory relative the current path of the active document.
Eg: if your document is placed in C:\Users\Dexter\Desktop\my-awesome-pixel-art.kra, the exported images will be in C:\Users\Dexter\Desktop\Exports\Version 1
Absolute example: Setting an absolute path (like, lets say: C:\Users\Mike\Pictures\My Pixel Art) will place all exported images in that folder, and ignore the document’s path.
File name: Add a custom name for the exported image.
Leaving it empty will add the document’s name.
Format: Select your preferred image format. (Supports .png, .jpg, .webp and .bmp)
Naming Options
Add scale: If true (checked), it will add the scale factor to the file name.
Overwrite: If false (unchecked), will add an unique time stamp for avoid overwriting files.
This is useful if you want to manually save some “snapshots” of your drawing and don’t want to overwrite the images.
If true (checked) the files with the same name will be overwritten.
Selection options
Crop - If true/checked, it will crop the exported image to the bounds of the active selection.
Mask - If true/checked, it will only include in the exported images the pixels inside the active selection.
Export buttons
Selection only - If true/checked, it will only export the region selected. Useful if you want to export only an specific area/region.
📁 - Click to open the folder with the exported images.
Export Scaled - Exports the whole document.
Export Selected - Exports only the selected layer/layers/group
Trim - If true/checked, the exported layers will be cropped to their bounds. If false, their size will be the document size.
This is useful, for example, for exporting different sprites for a game easily 🎮.
The x1 buttons export the image/layer/group with their original size, without scaling.
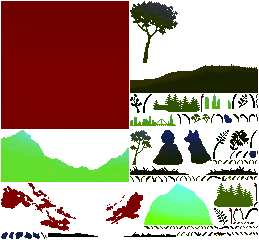
Selection buttons
Press one of the buttons to select all the Paint Layers that have the clicked color label.
These are useful for using them with Export Selected (layers) and when exporting a spritesheet, for easily exporting a set of layers/images.
Use SHIFT + LClick for adding the Paint Layers to the current selection.
SZK SpritePacker
Tool for exporting a set of layers/sprites into a single image (this is useful for game development and such).
How to use it
Select all the layers you want to be included in your spritesheet
In the Export Tab, press the button Create Spritesheet
A new window will appear:
Options
Directory: The folder where the spritesheet is saved. Supports absolute and relative paths.
By default, it will be saved in the same folder of the .kra file.
File Name: Name of the spritesheet image. By default, “spritesheet”.
Method: There are 2 different algorithms for packing the sprites; Variable Sizes and Fixed Size:
Variable Sizes: Each sprite/layer will occupy the minimum size possible.
Fixed Size: Each sprite/layer will be contained in cells of the same size, positioned in columns and rows.
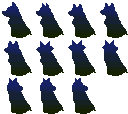
This is ideal for exporting animations.
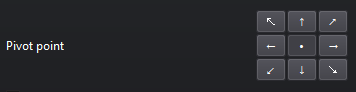
When Fixed Size is selected, a new option for selecting the pivot appears:
This is useful for not needing to later adjust each frames manually in game engines.
I used it in the dog (Dexter 🖤) spritesheet to center its animation:
Margin: Adds an empty space between the sprites.
This is useful for avoiding pixel bleeding in game engines and such.
Include invisible layers: If unchecked, the layers that are not visibible won’t be included in the spritesheet.
Export .JSON: Exports a .json file that contains the info of each sprite (the name, the rect occupied in the spritesheet, its position in the .kra file, etc). This allow to manipulate the spritesheet via code with the info contained in the .json.
I made an open sourceaddon for Godot to easily import the spritesheets into Godot, for building scenes replicating the .kra document. You can know more about how I applied it in this illustration.
Info panel: Shows the total layers included, the size of the spritesheet, and a preview of the spritesheet.
Buttons
Reload: Refresh the spritepacker. Useful if you changed the selected layers in Krita.
Save: Saves the spritesheet (and .json if selected).
Save and Open folder: Opens the spritesheet’s directory after saving.
Cancel: Discard the spritesheet.
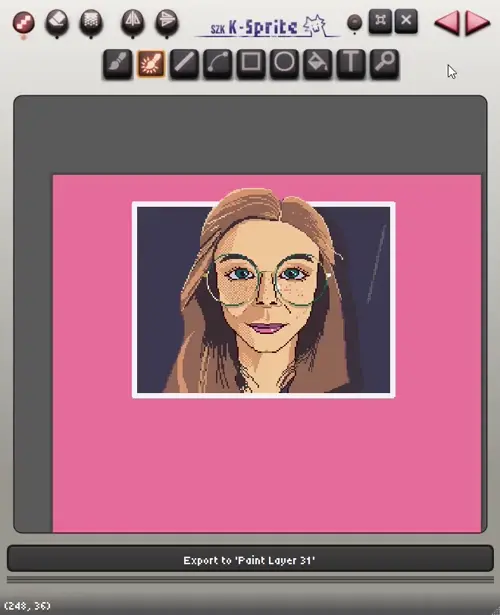
K-Sprite
K-Sprite is a Pixel Art editor inside Krita that is meant to add all the Pixel Art features that are missing in Krita. Like a pixel perfect brush, or tools for propper ellipses/circles, bezier lines, pixelated text, etc.
A ‘Drawing editor’ inside a ‘drawing editor’?
It’s not meant to fully replace the process of drawing Pixel Art in Krita (because Krita is still a great tool for that!). It’s meant to add all those tools that I always missed while doing Pixel Art, and to make creating Pixel Art in Kritaanevenmoreawesomeexperience!🥳
Tutorial
To execute K-Sprite, go to the Pencil Tab ✏️ in the docker, or press the shortcut for Open SZK K Pixel Art Editor (SZK Pixel Art Suite) (Default Alt+F3).
A new window will appear on top of Krita 1, and will grab the active layer2:
1 - The window will render on top always so you can still use other krita dockers/plugins while drawing in K-Sprite.
2 - The active layer will be temporarily hidden in Krita’s UI. This is due K-Sprite renders the document, and having it visible will make it impossible to see changes in case you erase parts of the active layer inside K-Sprite
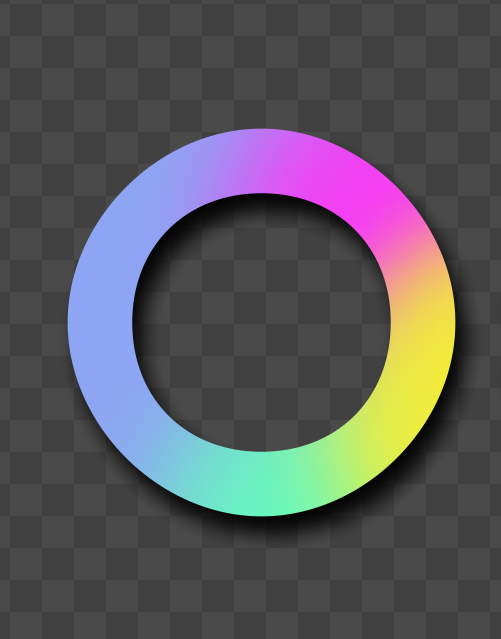
You will be able to draw in the layer you had selected when you executed K-Sprite.
This layer will appear on top, while the rest of the document will be in the background:
The selected layer (pink circle) appears on top when is edited in K-Sprite
Once you submit the changes, it will appear as usual in Krita, in its correct layer position.
When using the Dither Mode, you can use the arrow keys←↑↓→to offset the dither pattern:
I personally love using this tool when creating backgrounds and repetitive elements!
Offseting the pattern without moving the cursor/mouse will filter the previous pattern with the new offseted pattern. You can use this to came up with different results using with the same pattern!
To draw the original pattern with the offset applied, simply move the cursor to redraw it.
I’ve added moooooooresnapping angles for making perfect lines than what is usual in most Pixel Art editors:
Left: Other Pixel Art editors’ snapping. Right: K-Sprite’s snapping
This is due I personally like to draw perspective buildings, streets, etc. and I’ve always missed that some editors do not offer more snapping angles for doing some lines more easier.
Bezier Curves
Pixel Perfect cubic and quadratic bezier curves!
Shortcut: ALT+V
To make a Bezier Curve:
Click and drag to define start and end points on mouse click and mouse release.
Place the first control point by clicking a second time.
Place the second control point by clicking one last time.
For making a cubic bezier, simply click twice in the same position after adding the first control point and finish the curve.
(This is for adding the second control point in the same coordinates as the first one).
TIP: If you want the curve to still update even when the cursor is out of the editor, press (inside the editor) and drag wherever you need to make your curve.
The curve continues updating when the cursor is out of the editor boundsReason
This is due the points are added on mouse release, and if the window loses focus without an event pending (such as holding a mouse button), the editor can’t be updated.
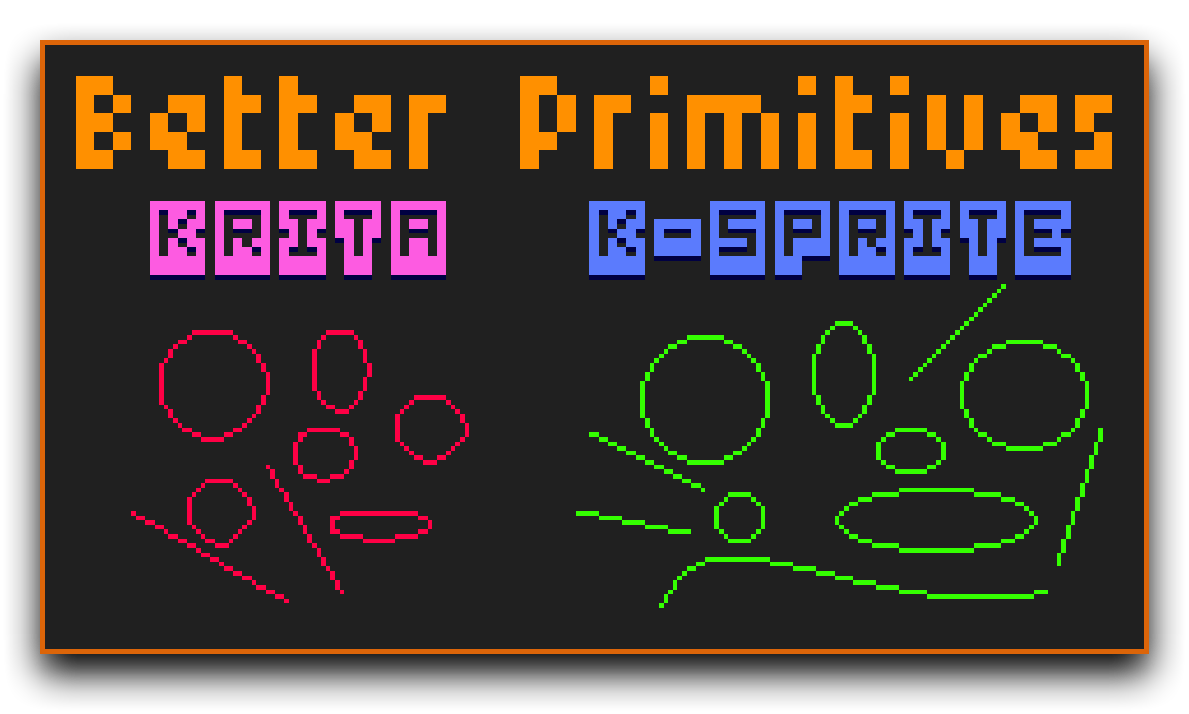
Squares & Circles
Tool for drawing Squares and Circles.
Shortcuts:
Rectangles: R
Circles: C
Krita primitives vs K-Sprite primitives
Shortcuts
Action
SHIFT (Hold)
Make 1:1 Squares/Circles.
CTRL
Make origin at center.
ALT
Move Square/Circle.
Fill Bucket
Tool for filling closed areas.
Shortcut: F
Some shapes filled with the fill-bucket and the dither option!⚠️ Warning about the fill-bucket tool
The fill-bucket uses a recursive algorithm (The flood fill algorithm), and Krita has limited the amount of recursive calls a script can execute, and this -sadly- cannot be changed.
This means that if the area to fill is big enough to reach that recursive calls limit, Krita will end that process and the fill won’t be completed and show this window:
I tried some non-recursive algorithms, but they are generally way slower than the Flood Fill algorithm, so it is best to use Krita’s fill-bucket tool for filling large areas.
I considered removing the tool, but since it still does the job well for small and medium areas, I decided to keep it, since sometimes is useful 👍.
Text
Tool for drawing pixel perfect fonts!
Shortcut: T
To add a text:
Click + Drag to create a rectangle that contains the text, or simply Left Click to create a default area.
Add and edit your text in the pop-up window:
Text editor window
Text editor window
1 Text input for adding your text.
2Font selector.
3 Font size.
4 Horizontal and Vertical alignment.
5Fits the rectangle to the text (useful if you need to recalculate the area in case the text is out of bounds).
6 Crispness treshold. This is useful for adjust non
7 Color outline.
8 Outline direction. Click one to toggle it on/off.
9 Clear/Check all outline directions.
Press OK to submit the text, or Cancel to -drumroll🥁🥁🥁- cancel/discard the text 🤯.
You can move the text while is being edited by Clicking its rectangle and dragging it:
Moving the text
TIP: It also worksgreatwithnonpixelartfonts!🎉🥳
Zoom Tool
Tool for precisely zooming in on specific areas.
Shortcut: Z
Zoom in on specific areas with Left Click+Drag
Zoom Shortcuts
Action
Left MB+(Drag)
Zoom in rectangle.
Left MB
Zoom In.
Right MB
Zoom Out.
Canvas
Here is where you draw. This area displays the current state of the document, and you will be editing the layer that was active when you launched the editor.
Controls
Shortcut
Action
Left MB
Paint with Foreground Color (FG)
Right MB
Paint with Background Color (BG)
Middle MB or Space + Left MB (Drag)
Pan Canvas
CTRL + Middle MB (Drag)
Zoom in/out
CTRL + Left/Right MB
Sample Foreground/Background color
X
Switch FG/BG Colors
1
(Zoom) 1:1 pixel scale
2
(Zoom) Fit minimum width/height
3
(Zoom) Fit document into viewport
TIP: You can mask regions for painting in K-Sprite by making a selection in Krita:
Selection Sync
This way, you will only be able to draw within the selection.
At the moment, there is no visual input inside K-Sprite to know if there is a selection active. You will have to look Krita’s canvas for that.
Export Buttons
Export the drawing/changes in K-Sprite to a New Layer or to the Active Layer in Krita
New layer will export the drawing to a new layer above the selected layer.
Active layer will export the drawing to the layer that was active when executing the editor.
👉 These buttons may show or not depending on the active layer when launching the editor.
Launching it with an empty layer will make not show the New Layer button (to avoid cluttering).
Launching it with a hidden layer selected will make not show the Active Layer button (this is to avoid committing changes to an invisible layer by mistake).
Info Bar
Displays information, shortcuts, tips, etc. when hovering a button/tool.
Info bar, at the bottom of the editor
This is useful for not having to remember every single shortcut, tip, etc.
Gamedev tools
This was made for solving a problem I had while making an illustration. It basically allows to modify RGB channels very easily on the selected Paint Layers, by doing mathematical operations and replacing each channel value.
This may be a niche but useful feature if you need to modify all assets/sprites in your document by encoding some information in the RGB channels, for later do some shader things in your game engine (mostly for VFX and such).
Warning: It doesn’t support CTRL+Z for undo changes, so keep it in mind before using it!
How to use it
Select the layers you want to edit and press the buttons depending on the desired operation you want to apply.
Mathematical opperations
Allow to sum, substract, multiply and divide the selected layers by the selected color/channel.
The slide-percentage determines the strength of each color/channel when executing each operation.
Eg: Having the red channel selected, at 100%, will use it at full (255). Having the value set at 50%, will use a value of 255/2=127.
Press CTRL+Click on the color buttons to select the clicked channel as the Foreground Color.
When working with textures for shaders is common to use each channel color (at full, without the rest), so this is just a simple shortcut for each color.
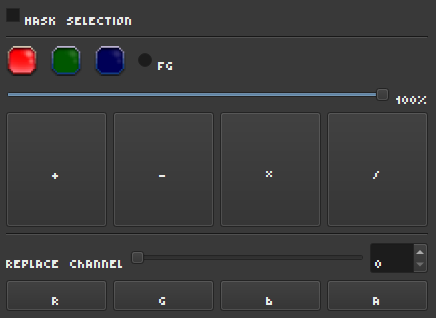
Channel Replace
Select the value you want to write the channel with with the slider or the spinbox (from 0 to 255) and press the buttons R, G, B or A to replace the Red (R), Blue (B), Green (G) or Alpha (A) channel.
After pressing it, the channels of the selected Paint Layers will be replaced.
Options
Mask Selection: If enabled, if you have an active selection, the changes only affect the content inside the active selection of the selected layers
Options
Index Painting Options
Add gradient: Adds a gradient to preview the dither and to sample colors.
Adding a gradient is useful to preview the aesthetic of the dithering pattern ✅
Position: Changes the position of the gradient (top, bottom, left, right).
Size: The size of the gradient as a percentage of the document’s size.
Invert: Inverts the gradient.
Method
Index colors: Uses an index color filter
Gradient map: Uses a gradient map filter. You can configure its dither pattern in its properties.
I personally preffer the Gradient Map option. Since is easier to manage colors.
Dither live preview: When selecting a new pattern preset or editing the dither matrix (by rotating, inverting it, etc), if there is a “Dither” layer selected (or a sibling) of the selected layer, the Dither layer will be updated automatically.
This is for being able to directly see how changes affect the shading dithering.
Scrolling through the presets (with arrow keys) automatically updates the dithering pattern.
Shortcuts
How to configure shortcuts in Krita
Go to Settings -> Configure Krita. There, click the Keyboard Shortcuts tab.
Search for SZK Pixel Art Suite to see the available shortcuts.
Shortcuts provided by the plugin:
Palette
When selecting a color from a palette in the Shading tab, you can move backward/forward the active palette color with the shortcuts:
Command
Default Shortcut
Previous Palette Color (SZK Pixel Art Suite)
-
Next Palette Color (SZK Pixel Art Suite)
-
Previous Shading Color (SZK Pixel Art Suite)
Alt+1
Next Shading Color (SZK Pixel Art Suite)
Alt+2
Previous/Next Palette Palette Color selects the next/previous color on the palette to the active color.
If the current active foreground color is not in the palette, it won’t do anything.
Previous/Next Palette Shading Color selects the next/previous color in the selected shading bar of the color shading tab, when a shading bar is selected.
K-Sprite
You can execute the editor with the shortcut:
Command
Default Shortcut
Open SZK K Pixel Art Editor (SZK Pixel Art Suite)
Alt+F3
I personally highly recommend to configure this to your choice. I personally like to trigger the editor as if I was changing of brush (for using one of its features, like the pixel perfect brush, or drawing a primitive, etc.)
Export Pixel Art
You can bind to a shortcut the action to export your pixel art with your current settings with:
Command
Default Shortcut
Export Scaled Pixel Art (Full Document) (SZK Pixel Art Suite)
(Not set)
Export Scaled Pixel Art (Selected Layers) (SZK Pixel Art Suite)
(Not set)
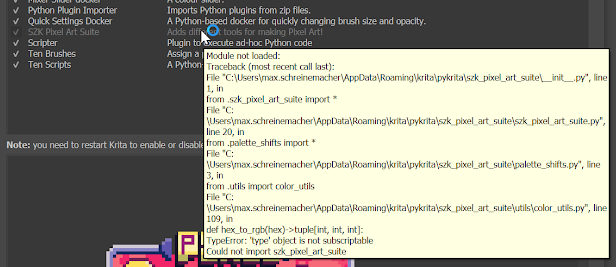
Troubleshooting 🔧
I can’t activate the Plugin 💡
I can’t activate the plugin, the text is grey, and when I hover I get the error Could not import szk_pixel_art_suite
This is because you are using a very old version of Krita that doesn’t support some new Python’s features that the plugin use.